
Thanks to various lock downs this year lots of companies were forced into facing the inevitable "digital transformation" they were putting off for so long... my current client is no exception. We started working from home in March and I haven't had to commute ever since. This hasn't meant my team nor I are less prodictive, quite the contrary! Most of us have won back at least 2 hours a day due to the fact we don't have to waste our time commuting to an office that served no other purpose than to show our presence and give middle management the fuzzy feeling of being in control.
Keeping A Work Life Balance
Working from home blurs the lines between work and personal time... some keep rigid hours and some, including myself, aren't able to switch off the same way. Anyone in a creative role will understand that once you are in "the zone", working hours just don't always make sense. The great thing about being at home is that breaking up the day into work and personal time is easier. I started growing herbs and vegetables in the garden, allowing for an escape from the computer every now and again to recharge and problem solve without actually sitting down in front of the screen. Being able to go for a quick walk or even pop over to the local cafe for a few minutes was ground breaking.
Gardening became more than just an escape, it was quite fulfilling to be able to put my own salad and tomatoes on the sandwich I was making for lunch time. Summer rolled by and autumn arrived in time to halt my gardening endeavours outside... not this year I thought to myself!
Growing Inside
I had heard of hydroponics thanks to documentaries I watched on various topics around sustainable living. We don't have a conservatoire that allows growing all year round and we don't have that much space to dedicate to indoor gardening in any case, so something with a small footprint was required.
Having done some research on hydroponic solutions and looking at readily available kits to purchase, I decided building one myself would not only be more cost effective but would also allow me to learn a great deal more than just installing one purchased from Amazon. YouTube has plenty of content on that subject and helped inspire my own design.
Why Aeroponics?
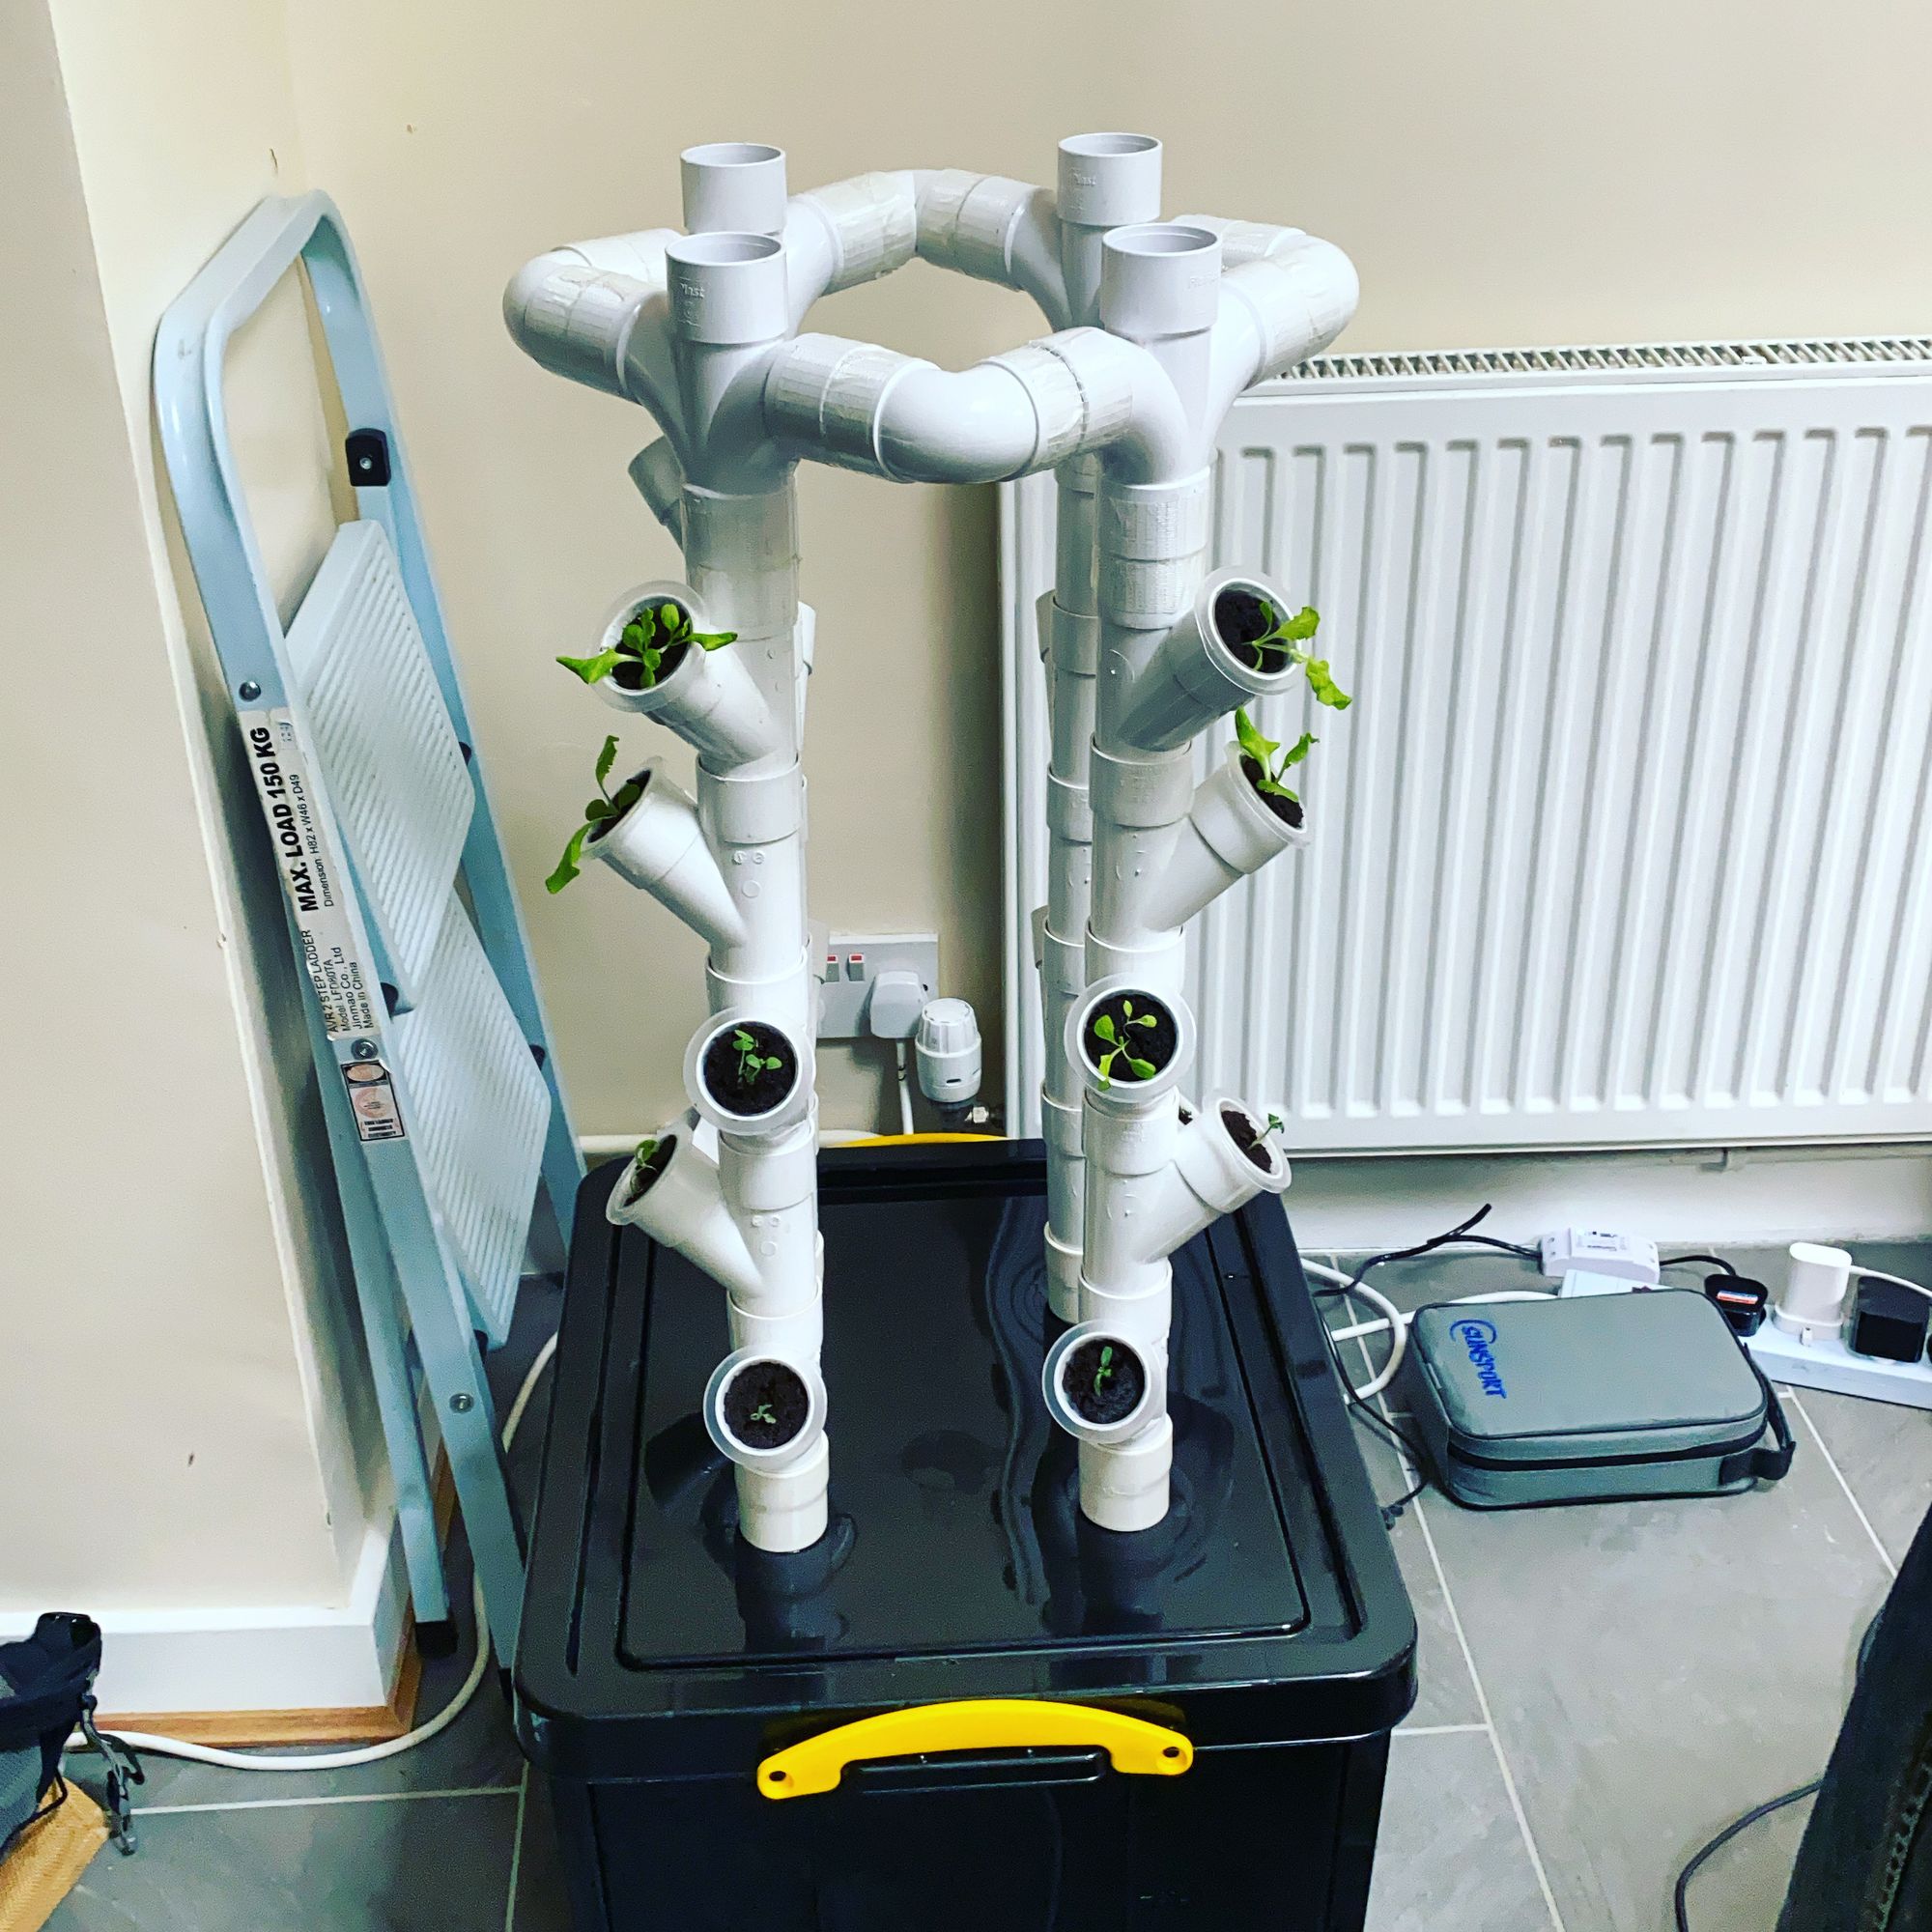
There are variations of hydroponics. Essentially all are more or less based around a water based growing strategy that doesn't involve soil. Aeroponics uses far less water and allows for vertical growing designs. The vertical growing aspect was what intrigued me and also allowed me to keep a small footprint in the house and still have the ability to grow a substantial amount of plants considering how little space this design would occupy. A 42 litre capacity storage container with 20 litres of water that gets circulated via a water pump in a closed system.
Design And Build
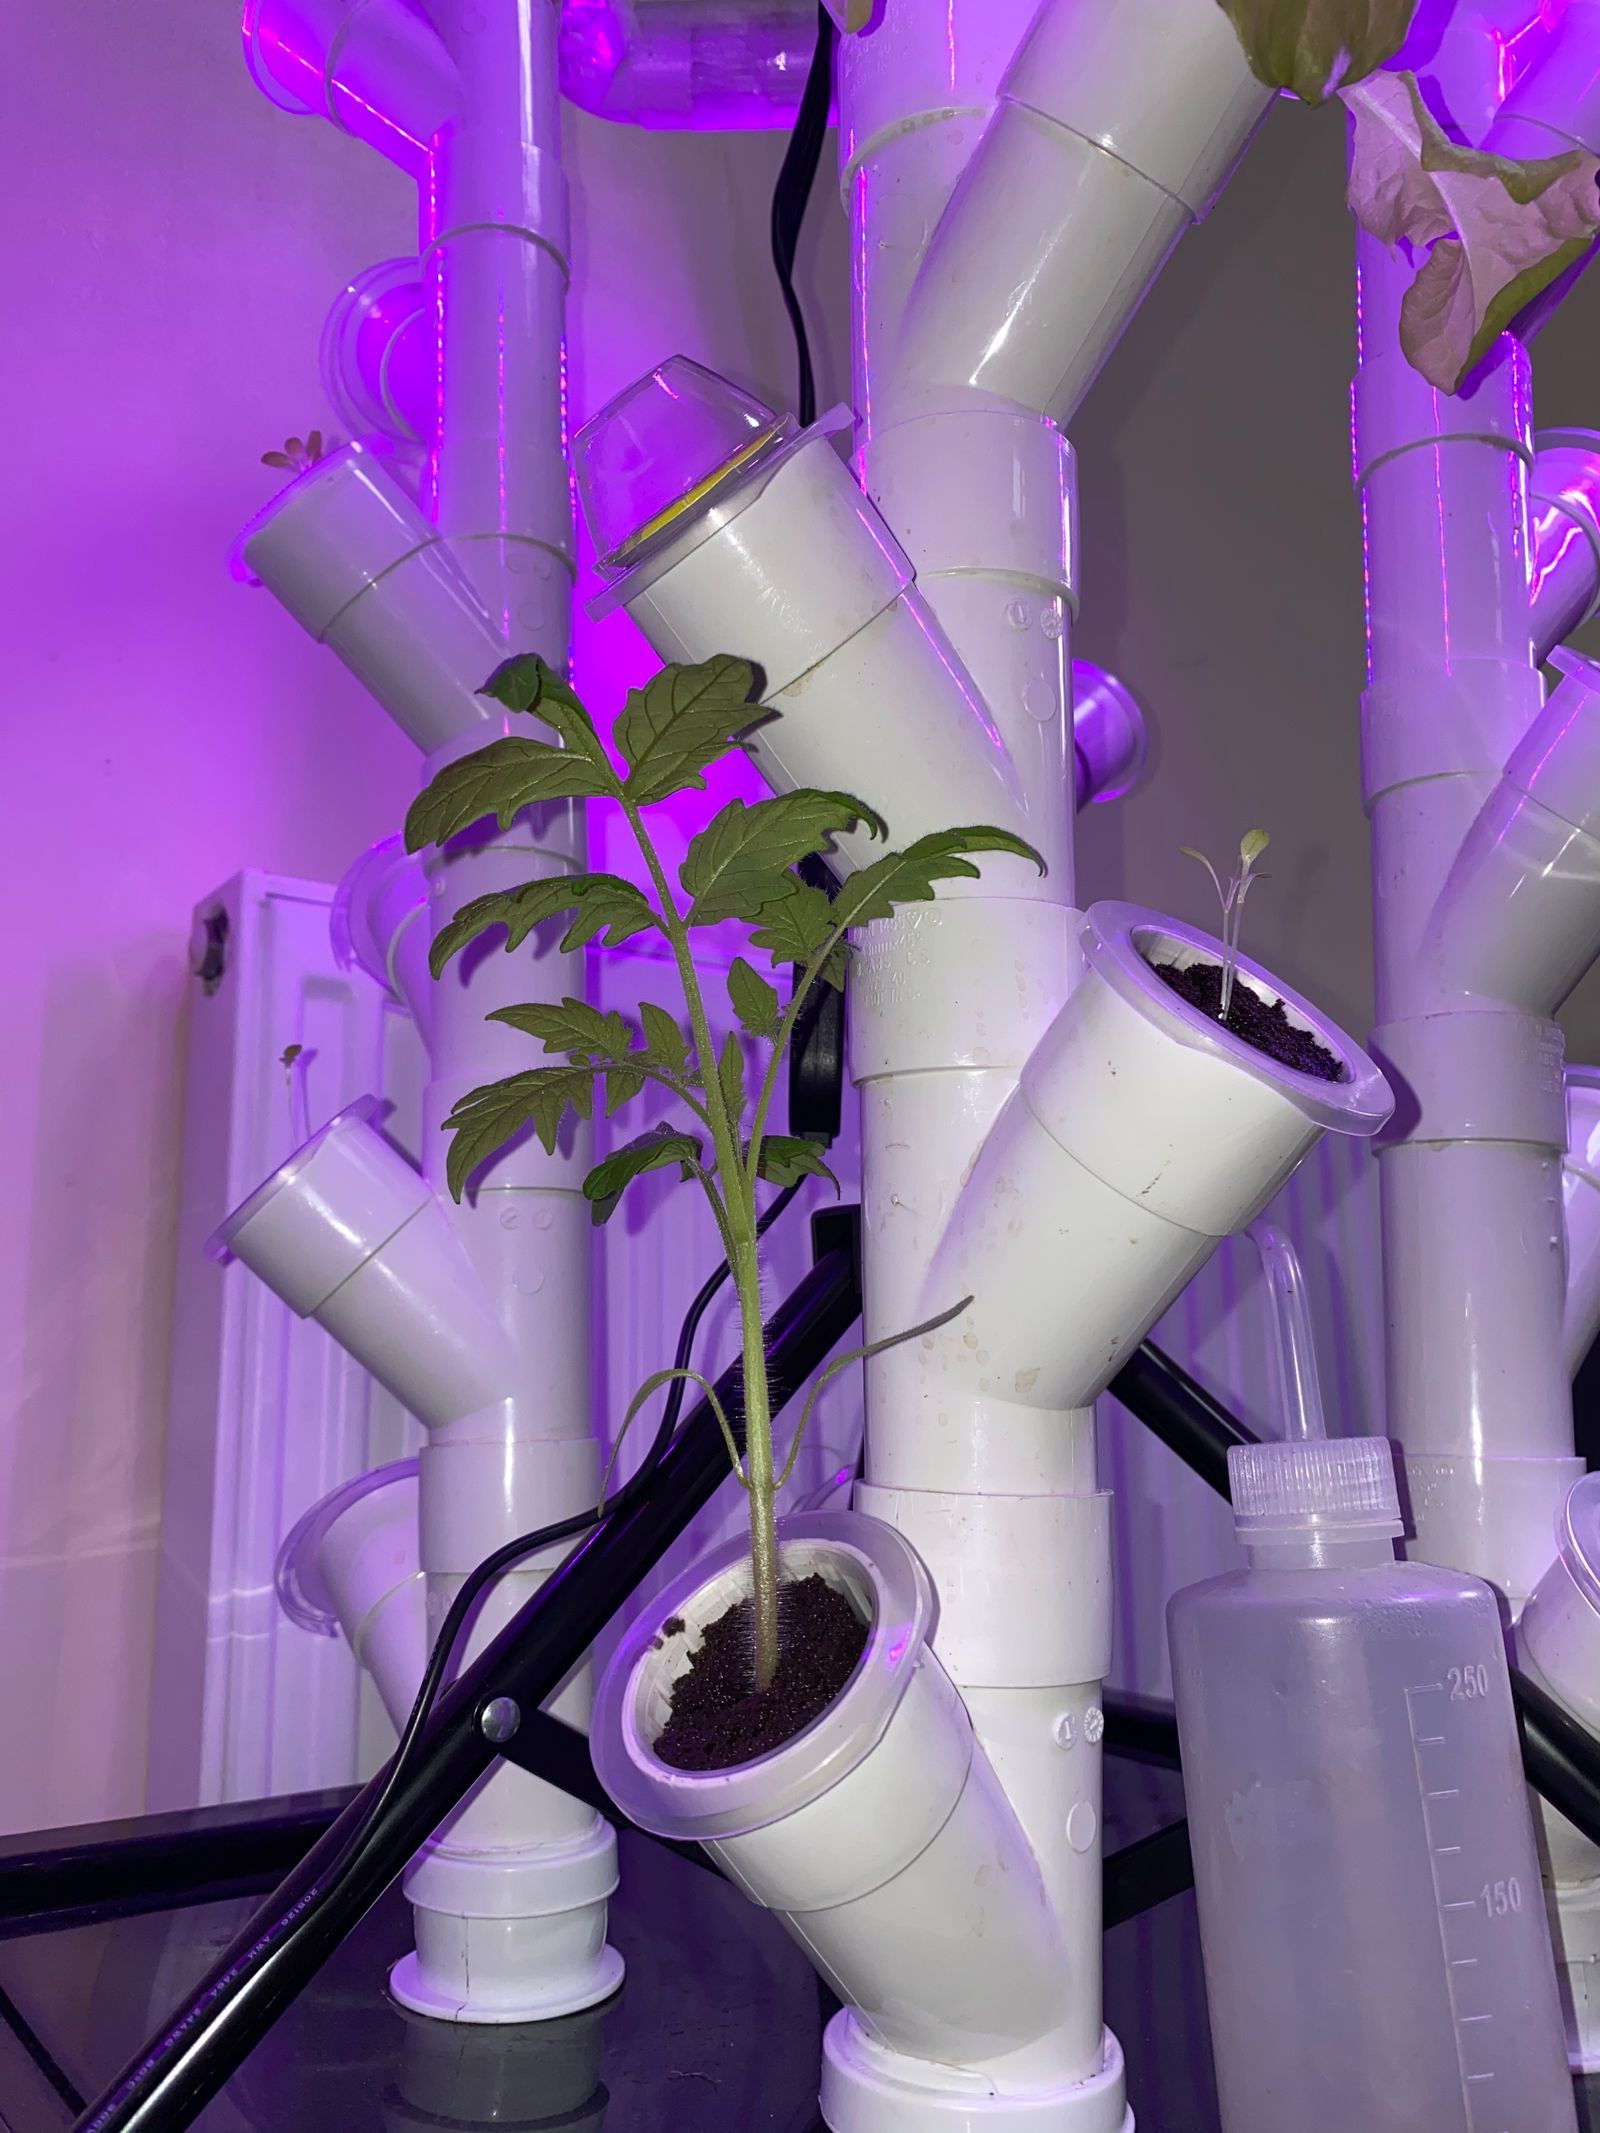
The tower I came up with uses regular plumbing supplies available either online or at your local plumbing supply store. I have 24 growing sites made up of "45 degree 40mm wye tees".
The base is marginally narrower and the towers lean towards the outside as it gets taller. This is to allow the water to run down the sides where the wye tees are open and the net cups with the rooting sponges and plants are inserted.
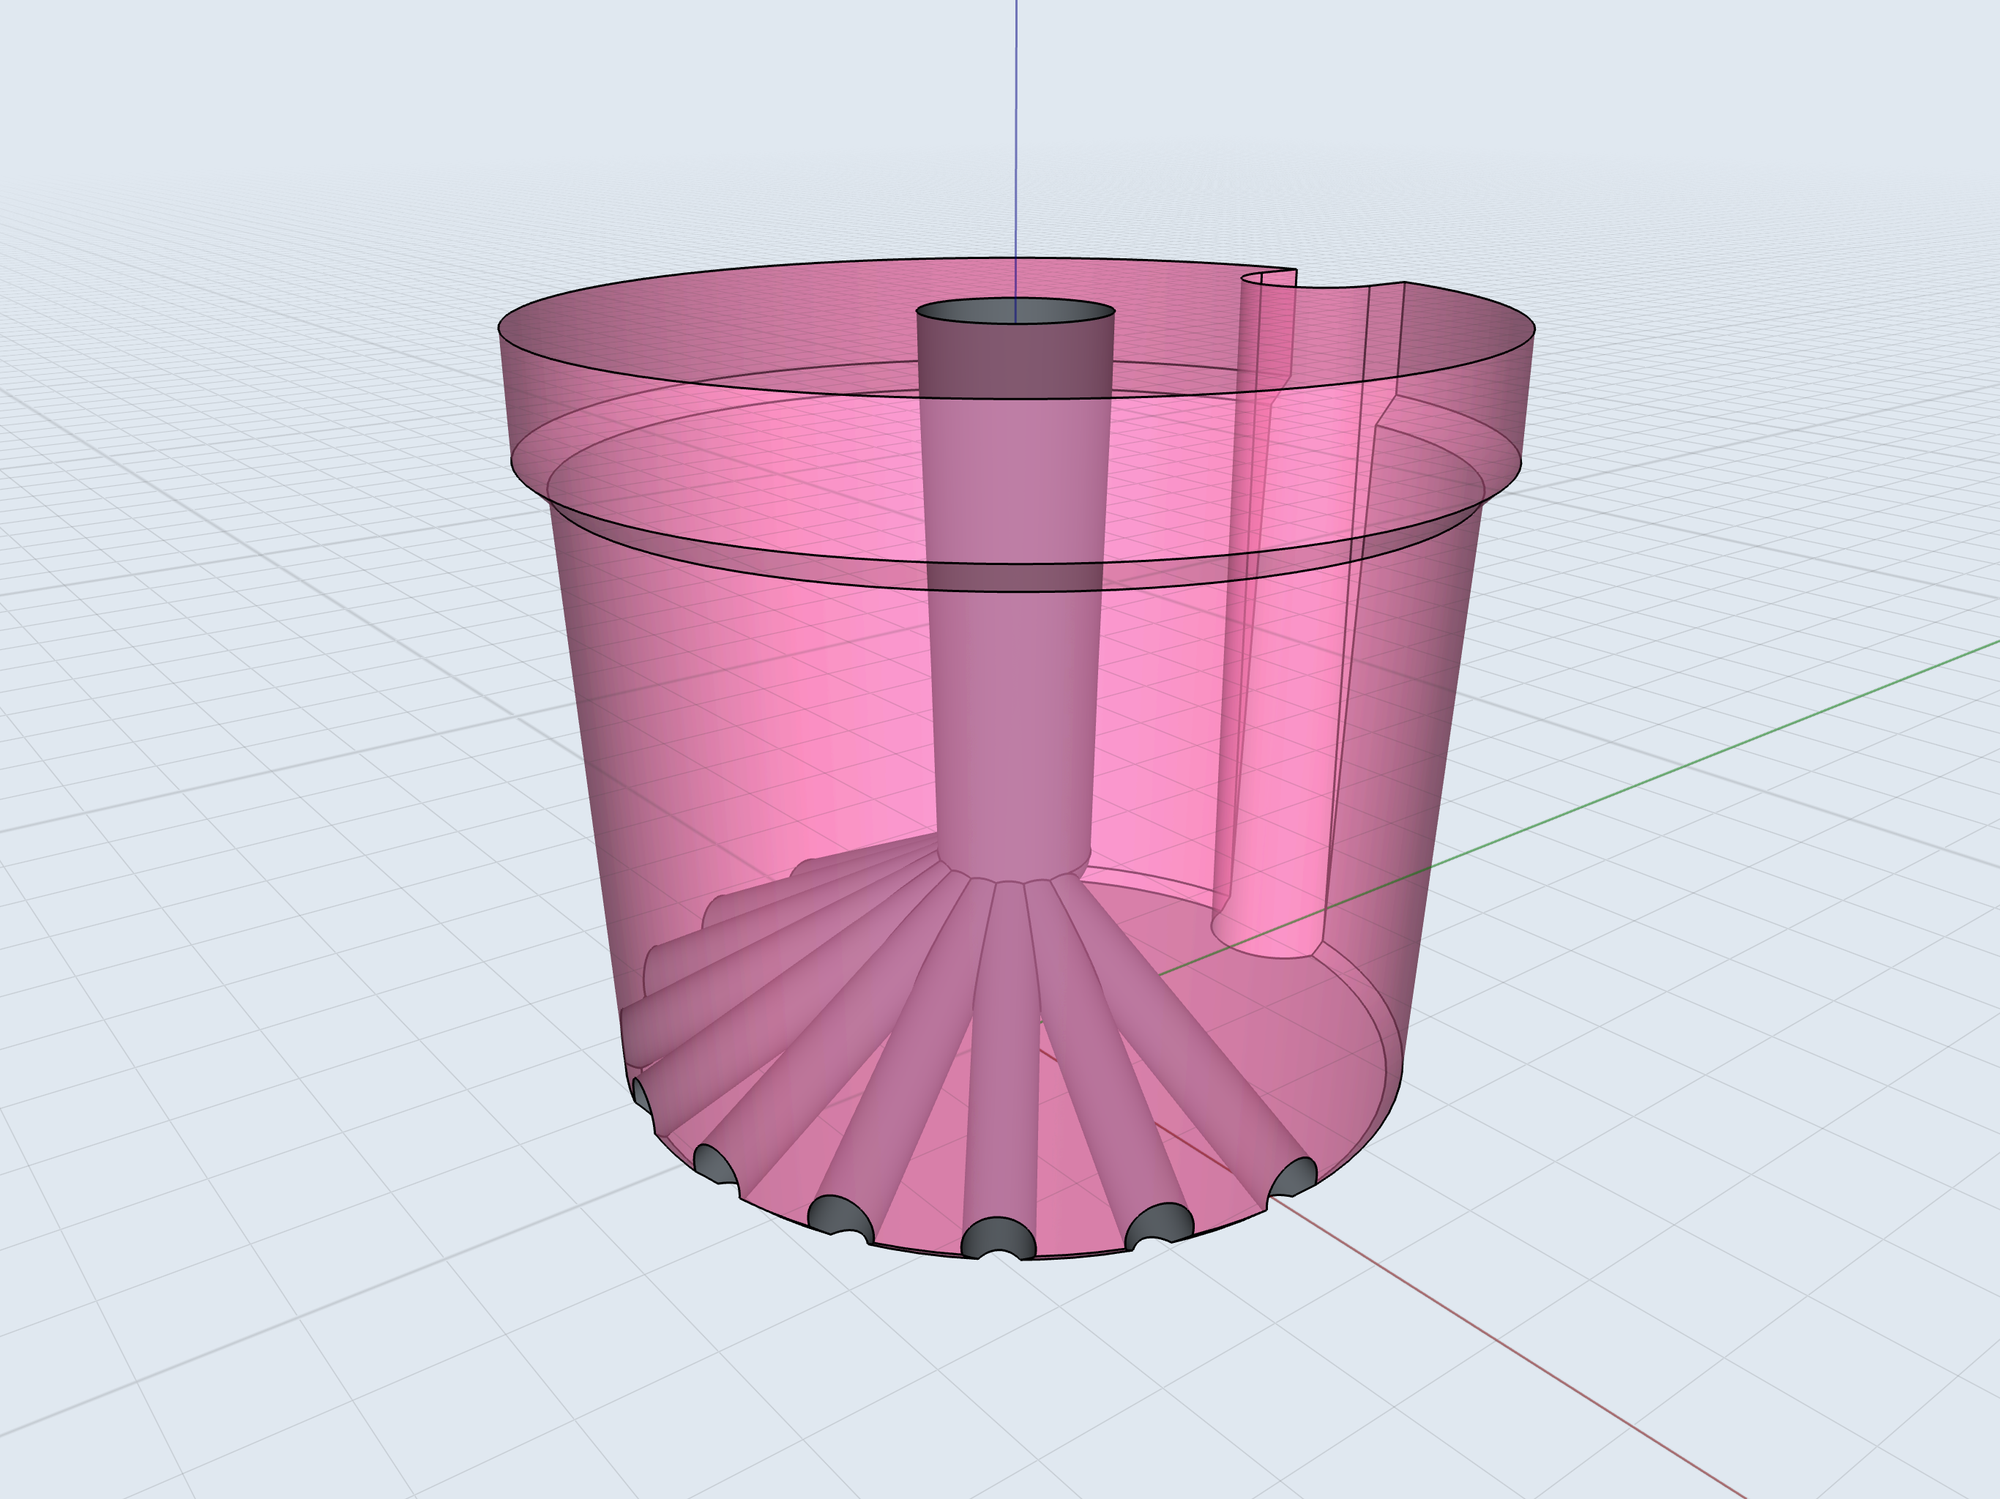
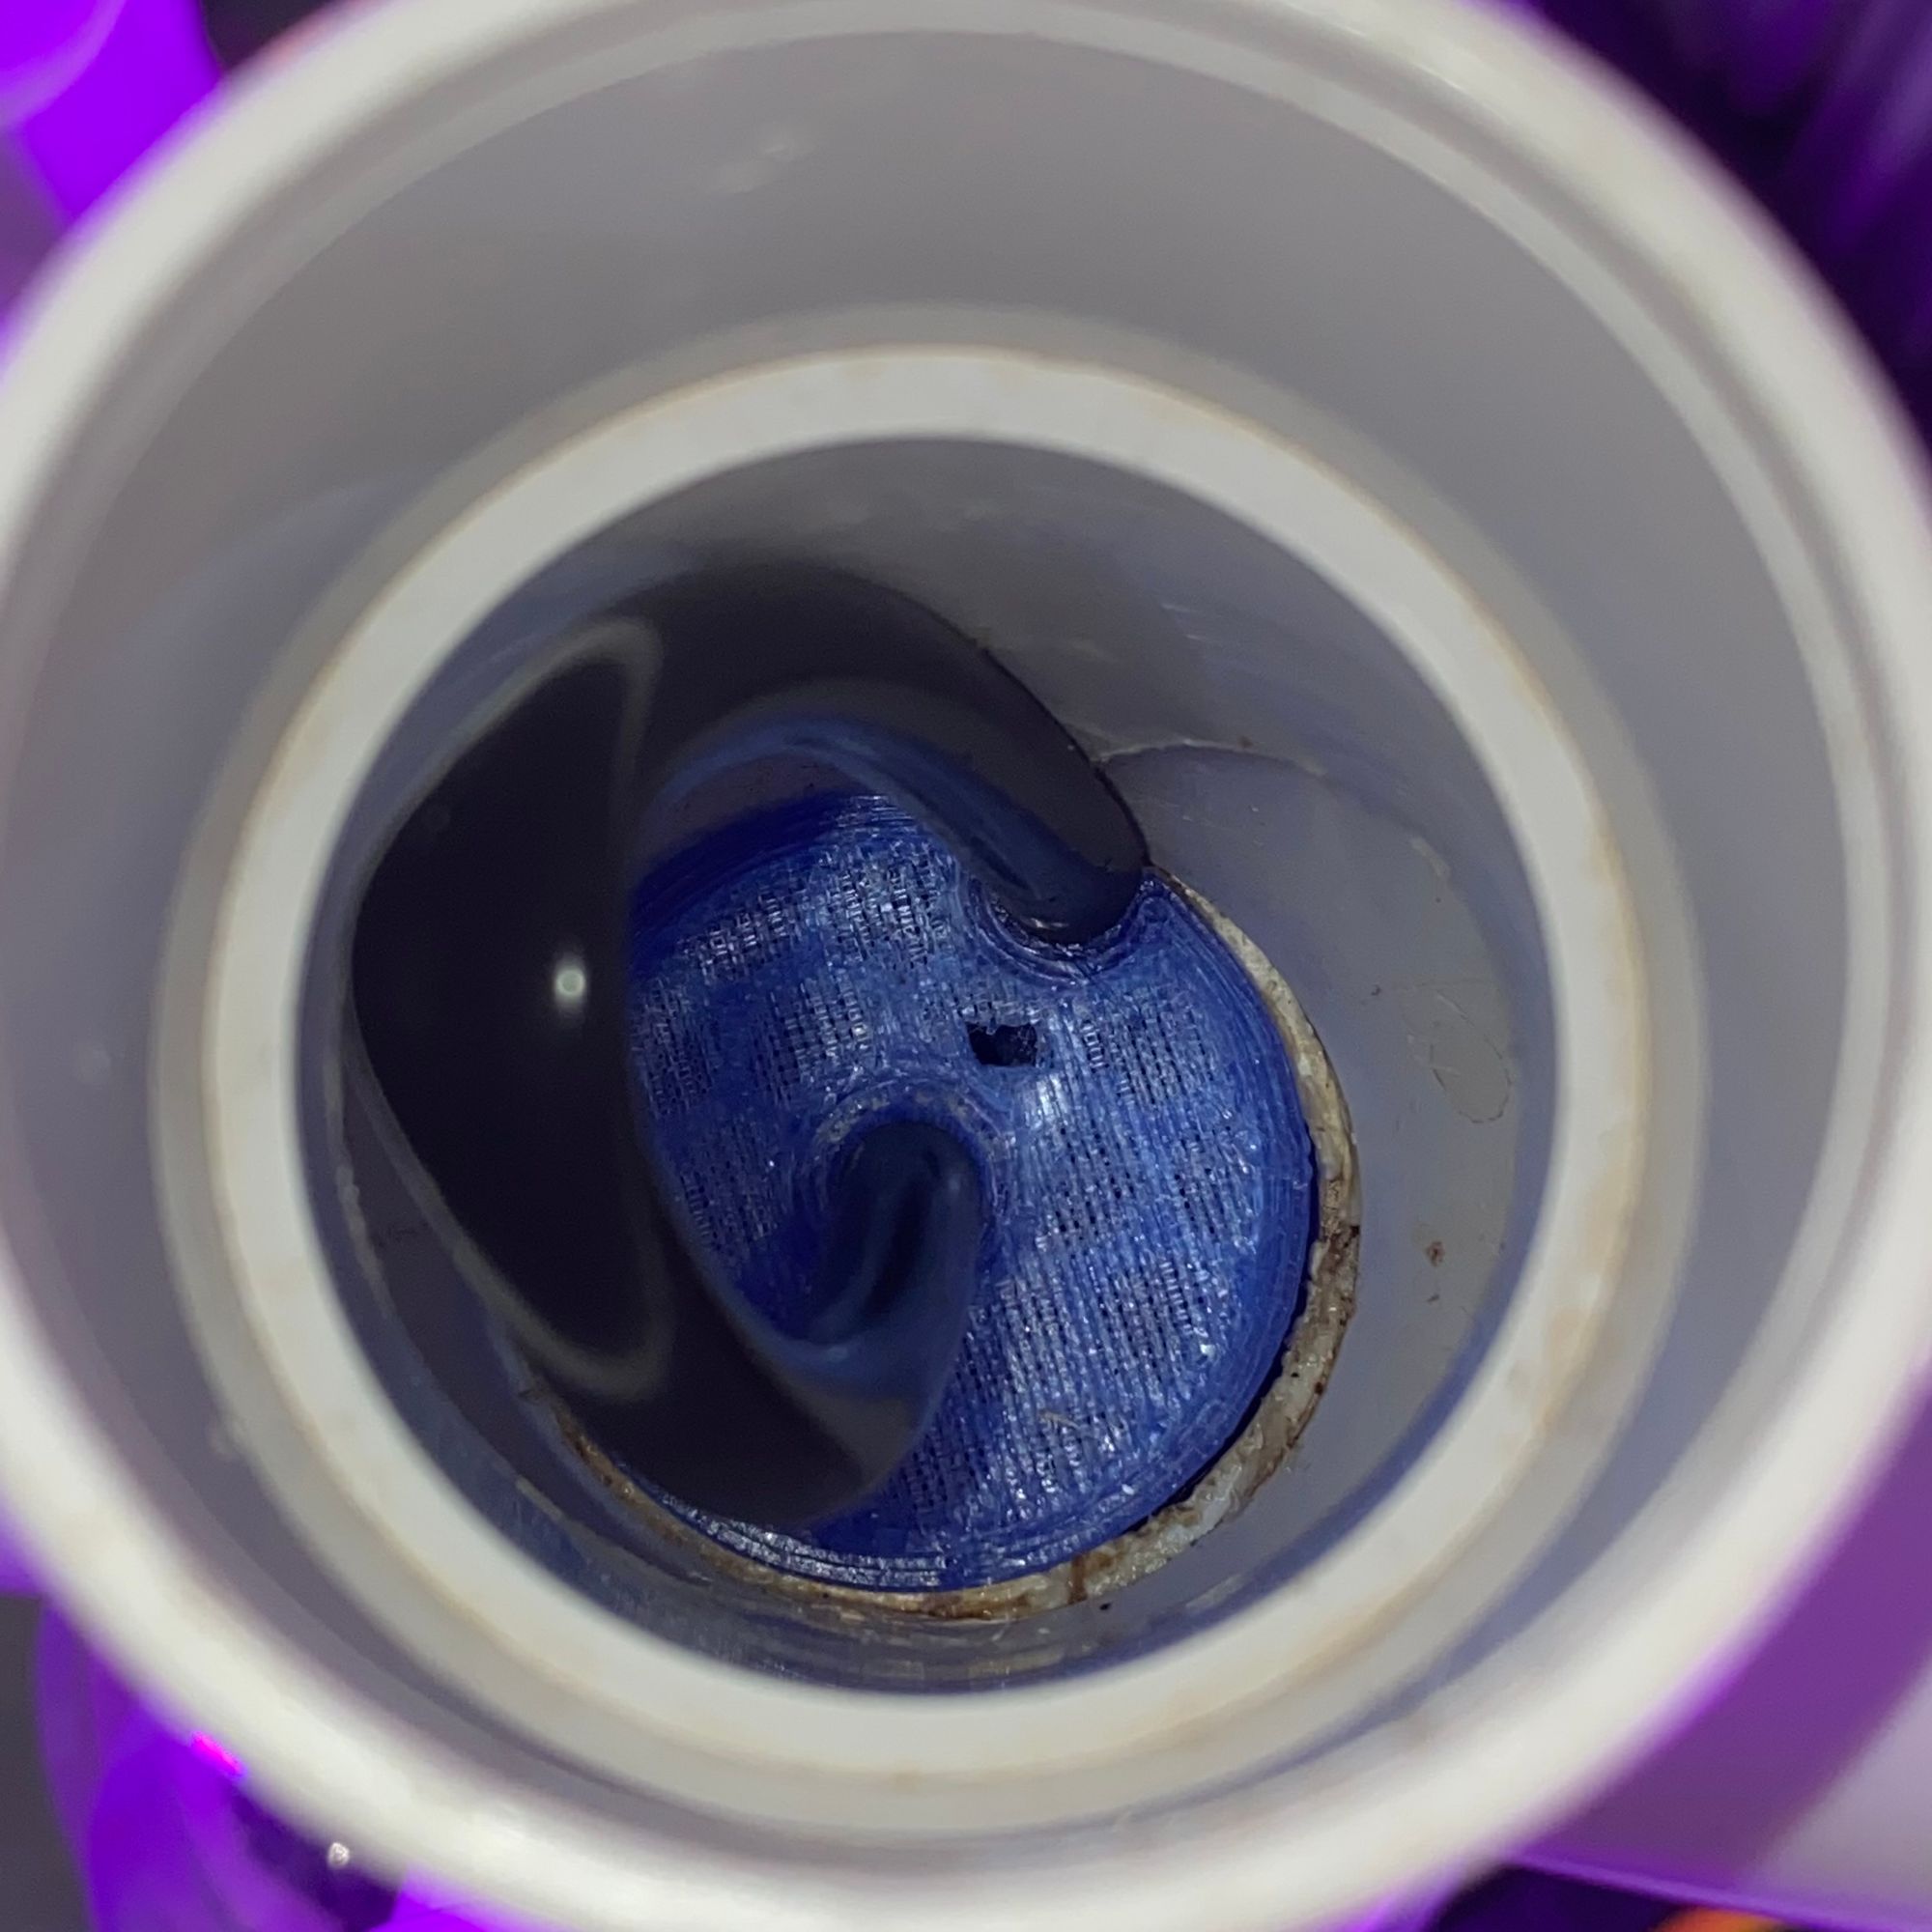
Inside the stacked wye tees the water supply is fed up to the top in 7mm tubing where they loop back and feed into a 3d printed sprinkler. I found none of the spray heads worked as I expected so I designed my own.
The base is held in place by 4 tank connectors that are placed into holes drilled into the lid of the storage container.
To get the top to be broader I used pieces of 40mm pipe with the 90 degree knuckle bends that feed into the cross tees at the top of the stacked 45 degree wye tees.
Wherever the parts were too snug I used a heat gun to soften the plastic to enable easier application. If the parts are to loose to friction fit I used some pvc solvent to bond them permanently.
Once the assembly was done on the lid, tubes where fed up the 4 tower sections and looped back into the sprinklers as seen in the picture above. These 4 tubes are connected to the water pump and feed water up to the sprinklers ever 15 minutes for about 5 minutes at a time. The timing is controlled via a raspberry pi that turns on the wifi enable power socket at given intervals. The ins and outs will be covered in another post.
The tank is filled with 20 litres of water and then the recommended amount of nutrient is added. The recommended amount and cadence will vary depending on the manufacturer. Once the tank is filled and water circulation is confirmed and the netcups with the root sponges show signs of hydration the tower is ready to accept the first plants and/or seeds. You can choose to grow seedlings elsewhere or you can attempt growing in the netcups and sponges from the get go. I have tried both methods successfully.
I'll be sure to update this post with any future modifications and be sure to watch this space for the post on automating the lighting system and water pump schedule using a Raspberry Pi.
Happy growing!
Parts List
- 45 degree wye tee 40mm (24)
- 90 degree knuckle bend (4)
- waste pipe cross tee (4)
- 3m 40mm pipe (1)
- tank connector (4)
- pvc solvent (1)
- storage container (1)
- water pump (1)
- smart plugs (2)
- raspberry pi, wifi enabled (1)
- irrigation kit or similar for pipes and fittings (1)
- net cups (minimum 24)
- rooting sponges (minimum 24)
- indoor plant lights
- plant nutrient